Thursday, October 4, 2012

How to make chainmail rose or rose vines


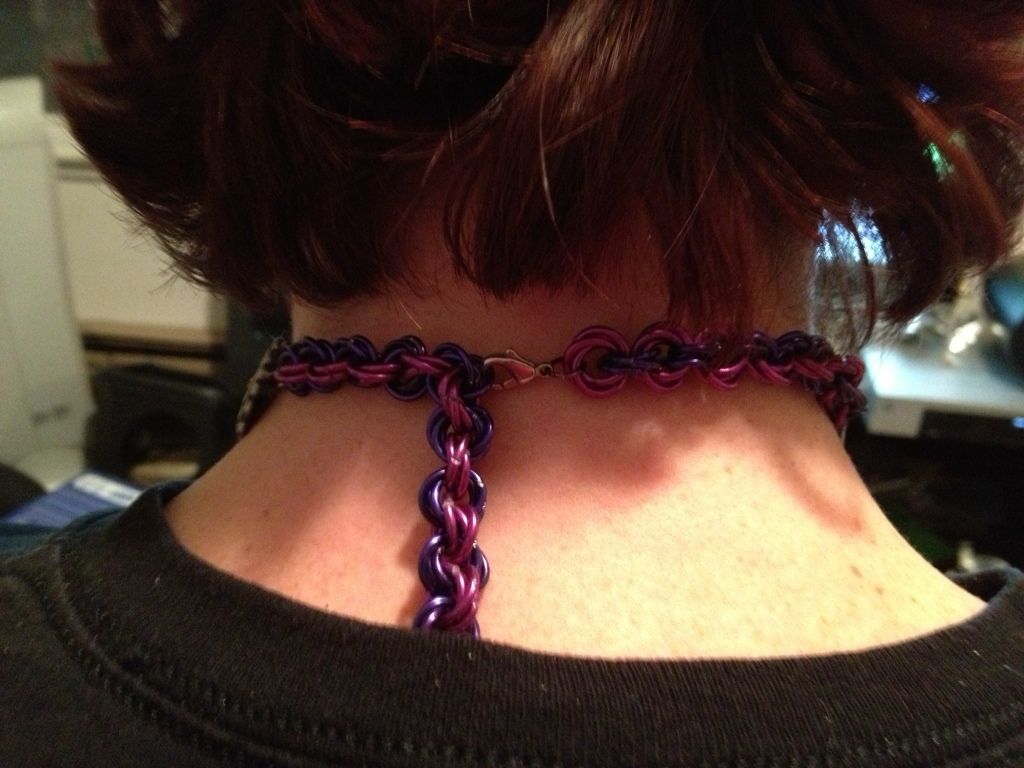
http://i1250.photobucket.com/albums/hh531/kwehkweh/24AB1820-6F71-4820-A48E-DB196B08362F-1652-0000012146429974.jpg?t=1349371514I know I know, I promised a tutorial on regular byzantine. But the project I started as a byzantine... and actually finished that way, didn't come off as what should be a byzantine. So I did a rose vine instead. And this is actually pretty easy. One of the easiest actually.

For one rose, you need 3 semi thick jump rings. Thinner ones don't show the actual rose pattern as well unless you make it small. So I tend to use a size 18 or 16g wire for this. On this one I used aluminum 16g. I suggest you use an 18g on your first vine.

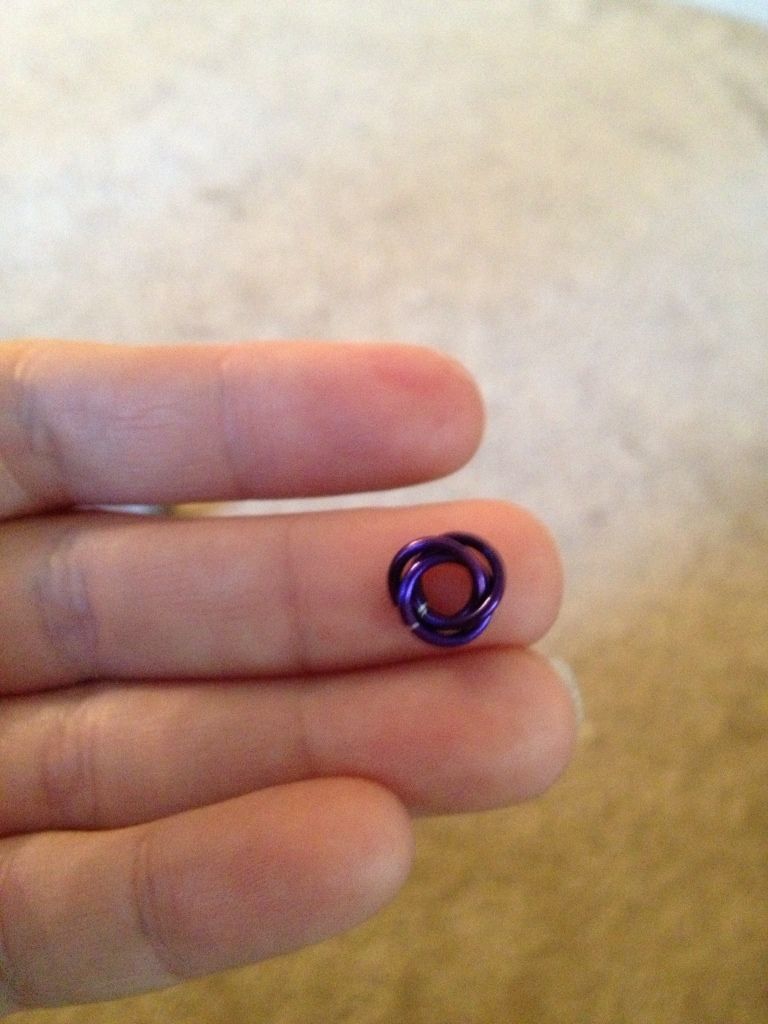
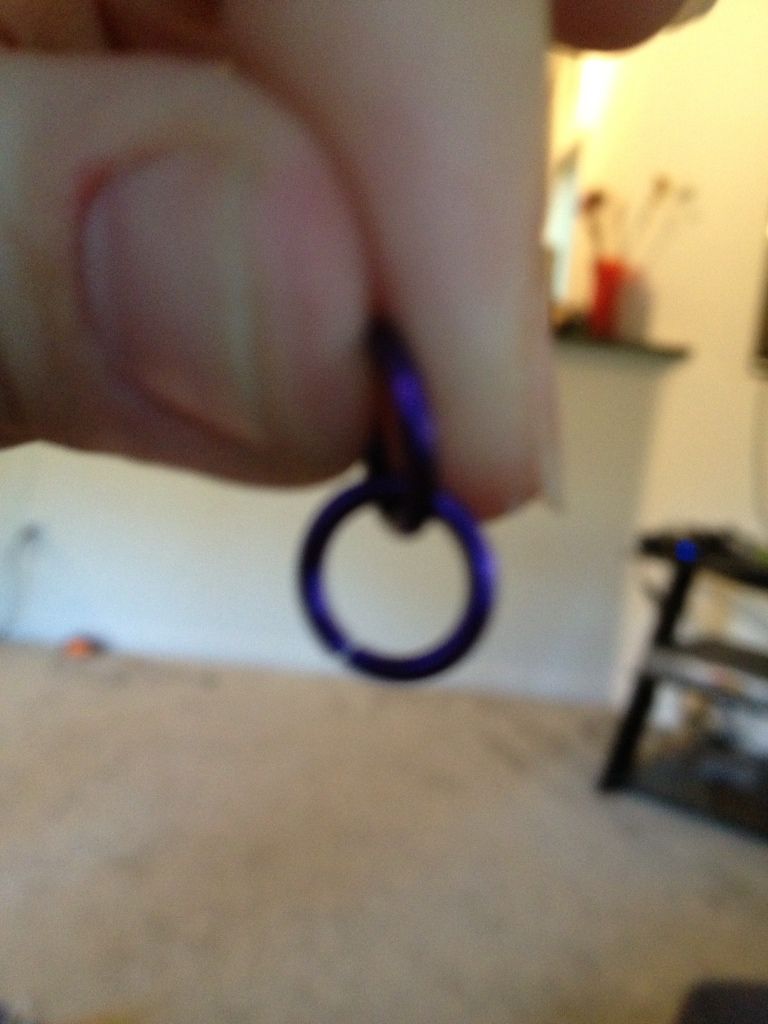
Step 1- Take one closed jump ring and put an open one through it. Now close the open one.
http://i1250.photobucket.com/albums/hh531/kwehkweh/41ACF59D-2818-44F3-9A64-CAD43E07ED47-1652-00000120B1F03B52.jpg?t=1349371411
Step 1
Sorry this picture is so blurry.
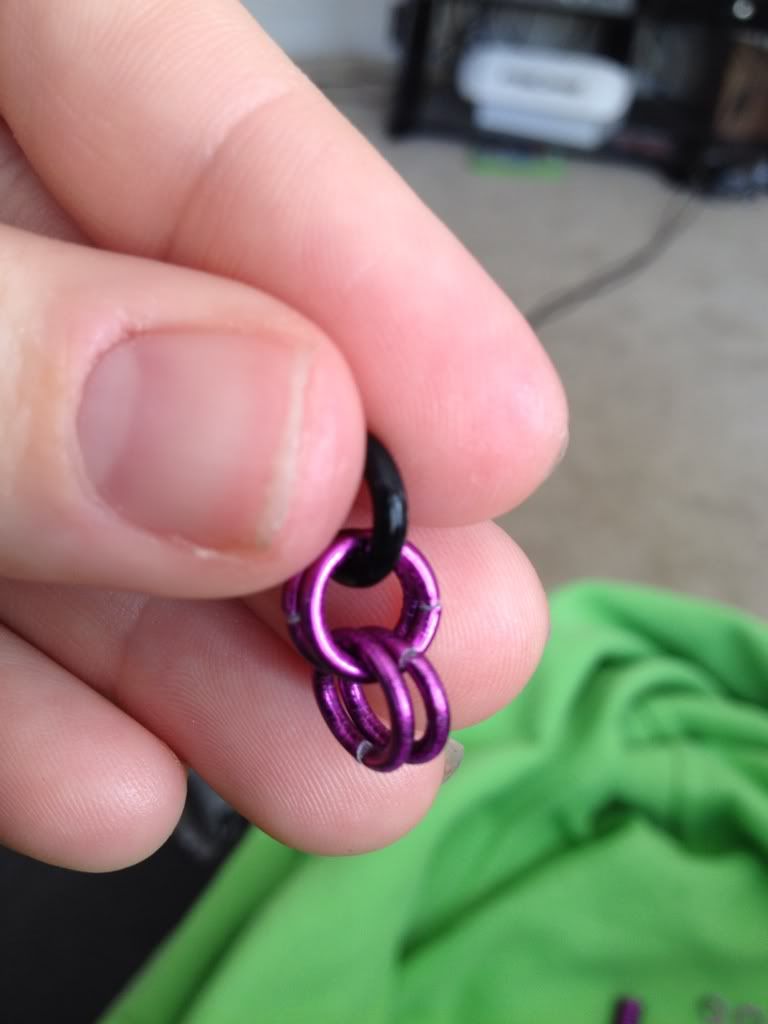
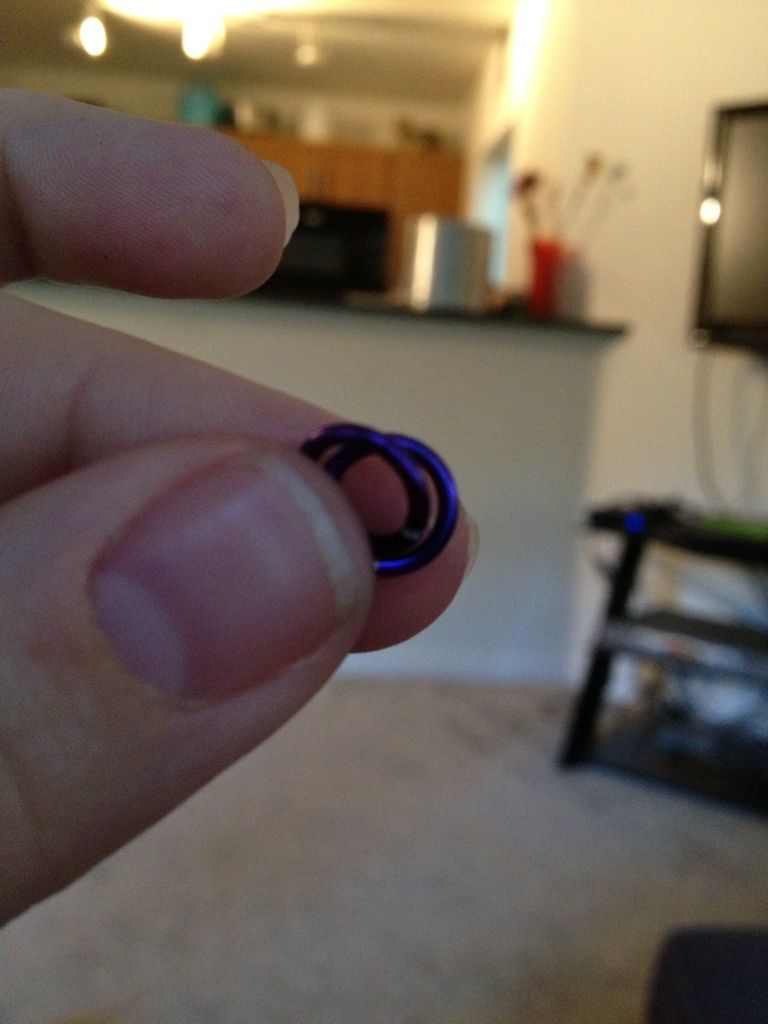
Step 2- Lay the rings over the top of each other so they look like one ring.
http://i1250.photobucket.com/albums/hh531/kwehkweh/CED45026-083A-4338-8457-5E0F75867BFC-1652-00000120D0BDFF85.jpg?t=1349371433
Step 2
http://i1250.photobucket.com/albums/hh531/kwehkweh/1B141323-C687-482B-BF22-6EAE90DE4C1D-1652-00000120BE7DE9F5.jpg?t=1349371420   


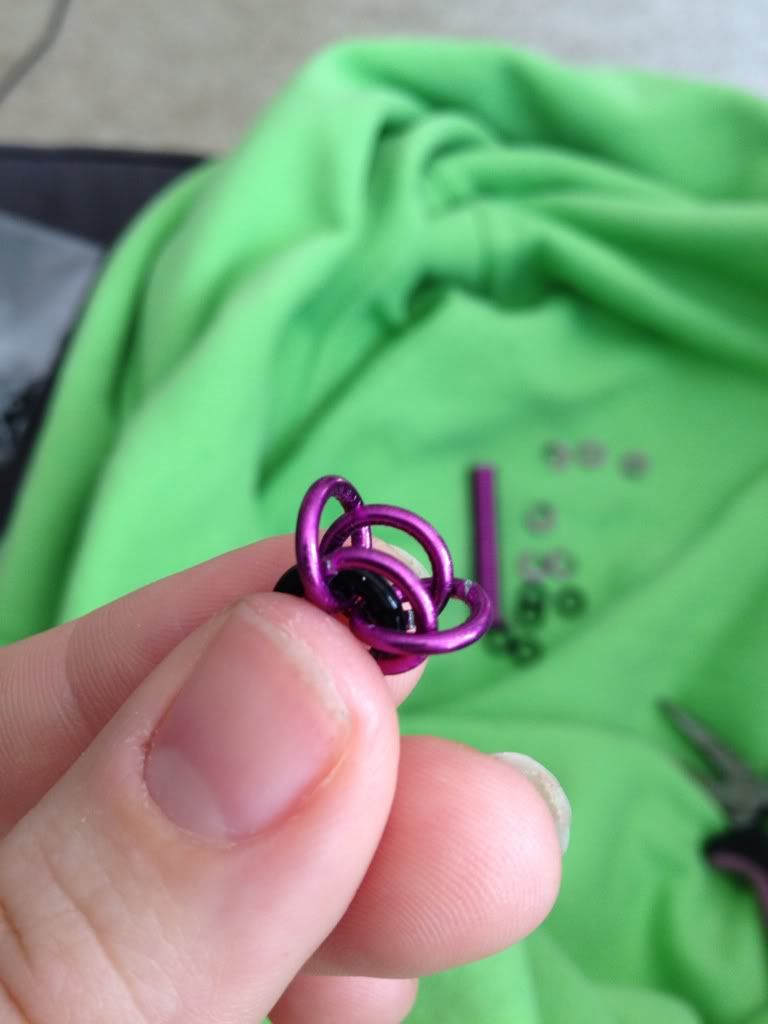
Step 3
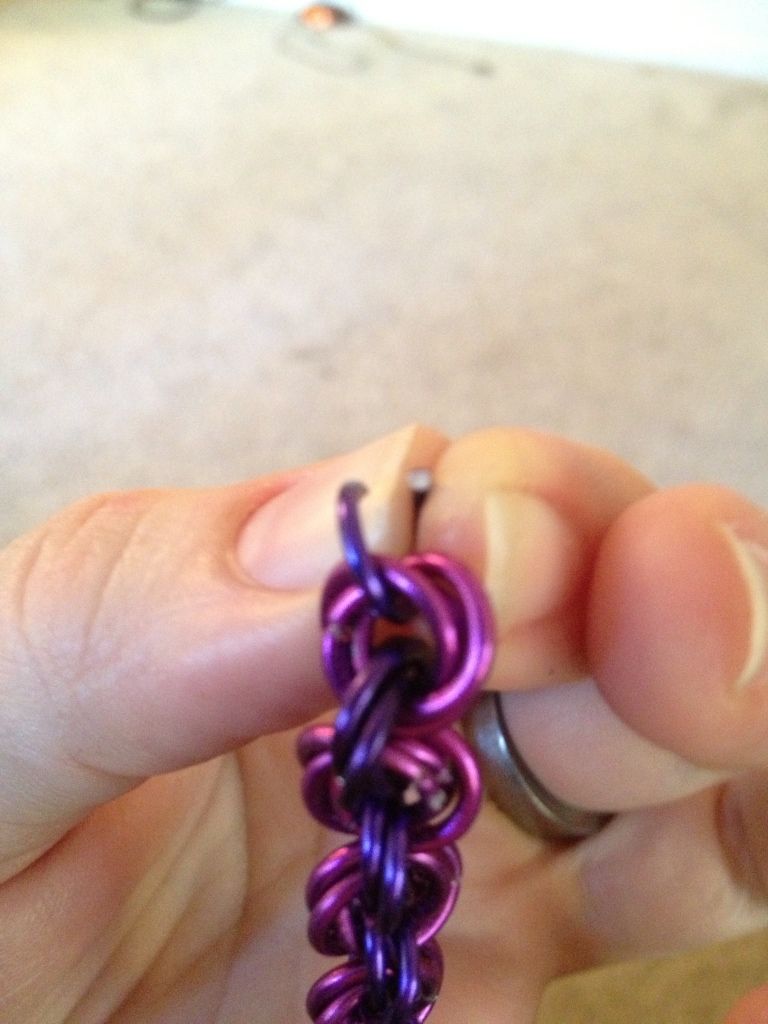
Step 3- Put one open jump ring through the middle of both jump rings and then close it. When you lay them over each other, they should look like a small flower. 


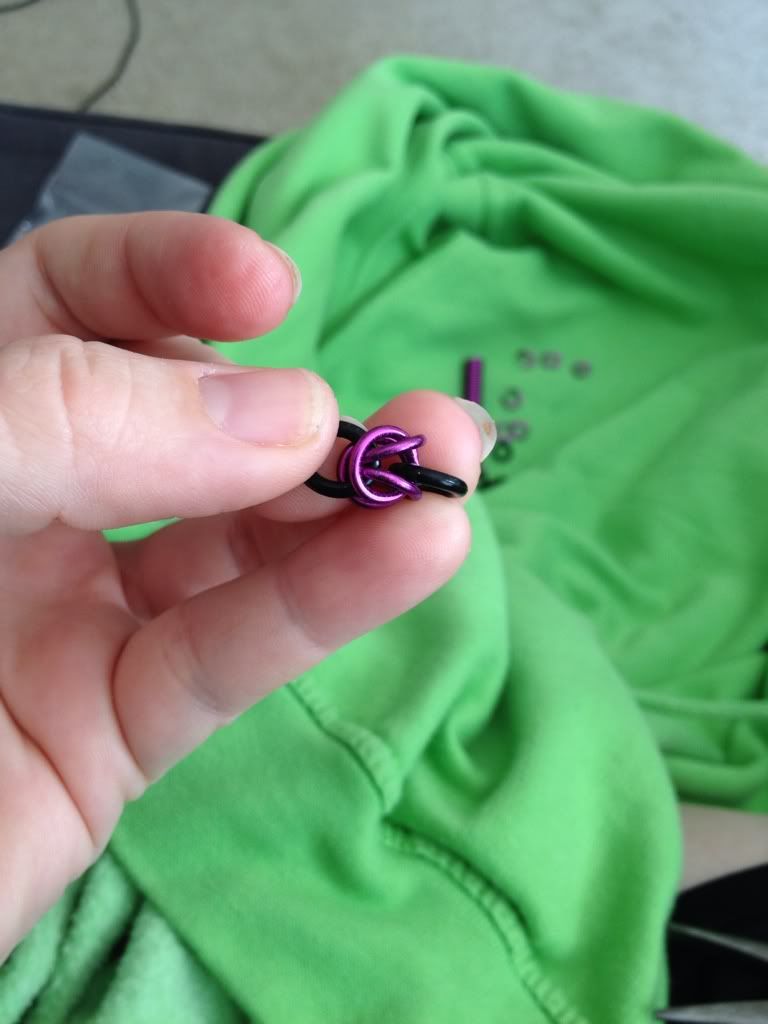
Now you have a flower. These were the original middles to my byzantine pattern which is how I got the idea to do the whole thing as a rose vine. But we need a vine of flowers, not just one flower.So we're going to move on.

What you can't tell from this picture is that the sides of the flower are about half the size of the middle of a jump ring. You can kind of see it in the first picture, but there will not be a lot of room in the middle of these rings. That's why I suggested you start with an 18g.

http://i1250.photobucket.com/albums/hh531/kwehkweh/97400B46-DBC7-4E12-B9DC-D09FA133BBB3-1652-000001210227B93D.jpg?t=1349371467
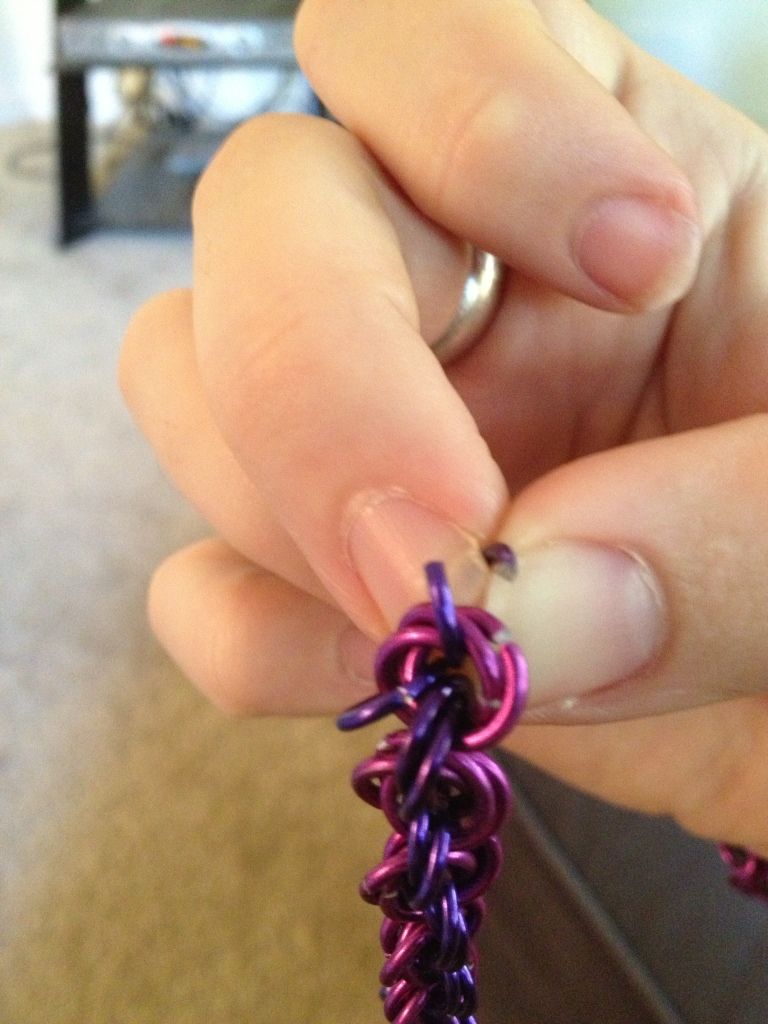
http://i1250.photobucket.com/albums/hh531/kwehkweh/EFF06E09-461D-401A-AD79-59C6FD799DF8-1652-000001211450DD1F.jpg?t=1349371479To add onto your vine, you're going to repeat the same process, but you're going to start by looping your first jump ring through the middle of the first rose (or whatever is on the pattern before your rose).
<---------------
 Now take another jump ring and do the same thing, but before you close it, run one side under the jump ring you had just put in. ---------->
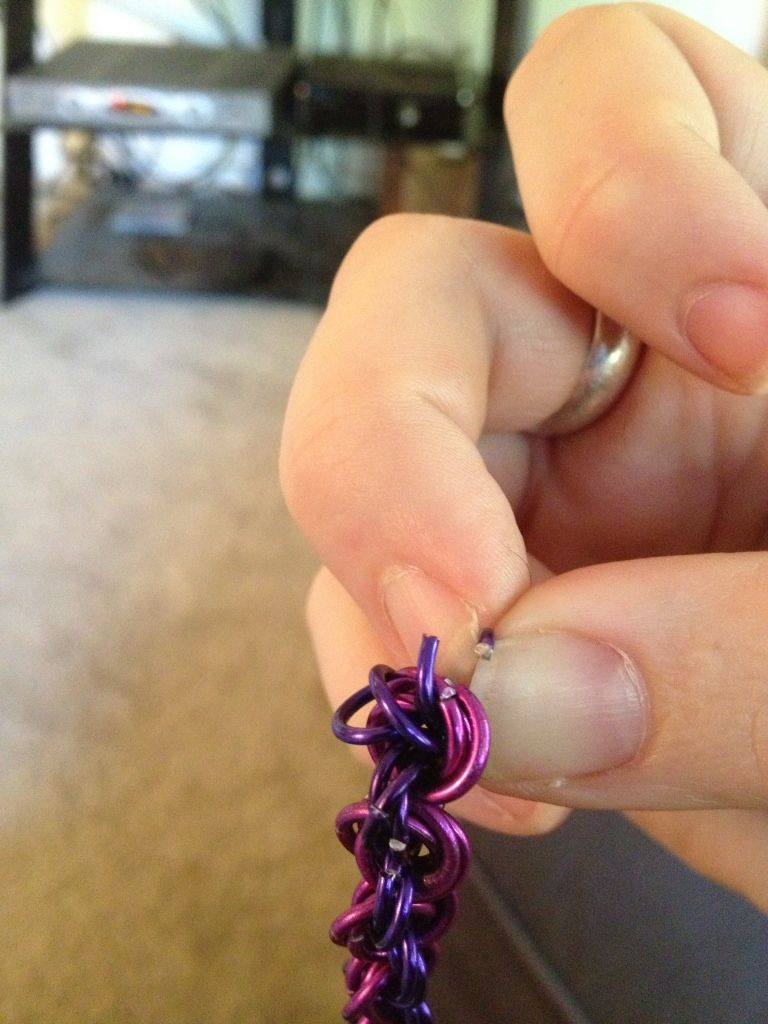


http://i1250.photobucket.com/albums/hh531/kwehkweh/DEBA8C10-94AE-486F-BACA-21FAAAE5AEF5-1652-0000012124893BEF.jpg?t=1349371491Now do the same thing with the next jump ring, except you run one side under both of the jump rings in this rose at the top. ------------------->


So the second rose is the same as the first one, except you're looping it through the hole of a different rose. You'll continue with this until you make a vine.

Vines look wonderful as the tails to chokers. But they are very thick. A regular lobster claw clasp like I have picture up top is not a wise idea. I share this with you because I, of course, tried it. The claw will only go through 1-2 of the jump rings in a rose, not all three. This leaves you with scratched up jump rings and a very hard to put on necklace. Instead I made a hook to a hook and eye clasp for this one. If you would like the tutorial on how to make these with 20g wire, please let me know. It will come up soon but I'm already working on the pictures for a different tutorial :)
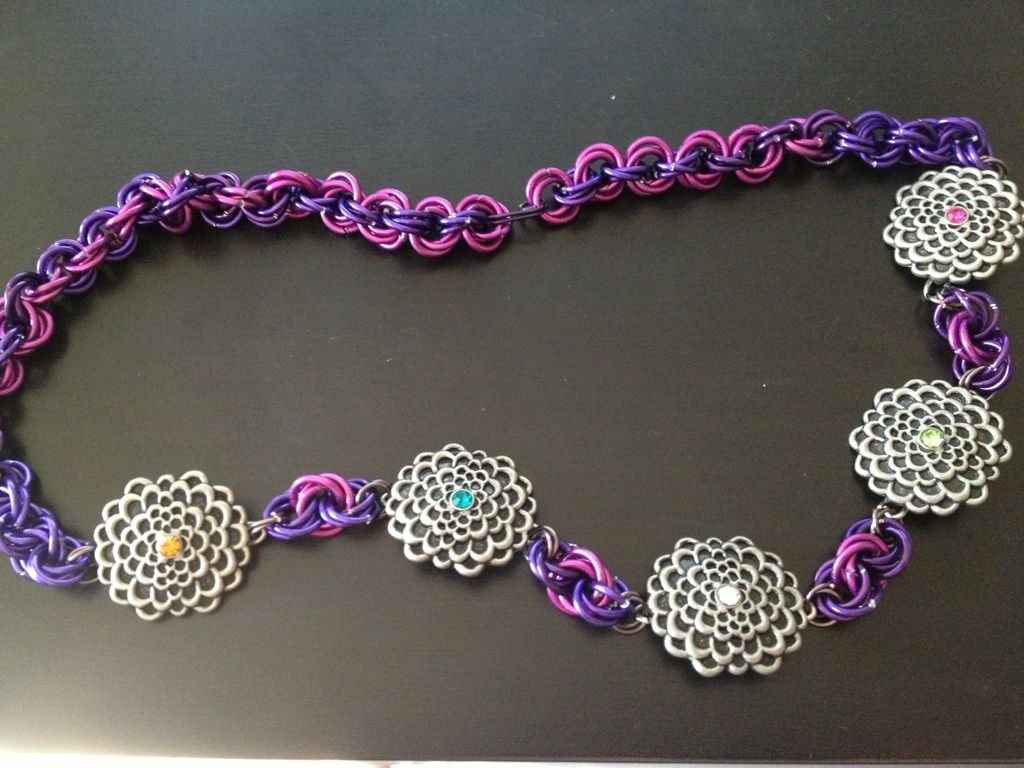
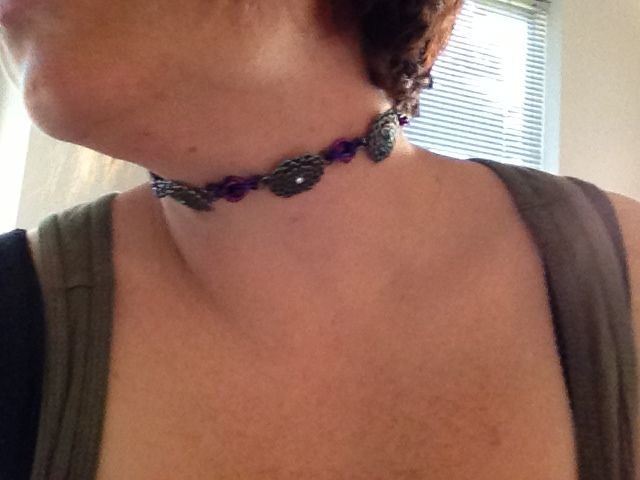
http://i1250.photobucket.com/albums/hh531/kwehkweh/6A862C07-C071-480D-AC78-5F30D939E863-2160-0000016B4AE89953.jpg?t=1349025642http://i1250.photobucket.com/albums/hh531/kwehkweh/D2E3CA7B-AF7D-4520-9B0B-25C1580E24F8-1652-00000121528DA991.jpg?t=1349371522Aaaaand for the finished project- http://i1250.photobucket.com/albums/hh531/kwehkweh/2F5A2798-8CD9-4C9B-967F-37F040141728-1652-00000121624A9205.jpg?t=1349371533

Available on Etsy, click here :)

Wednesday, September 26, 2012

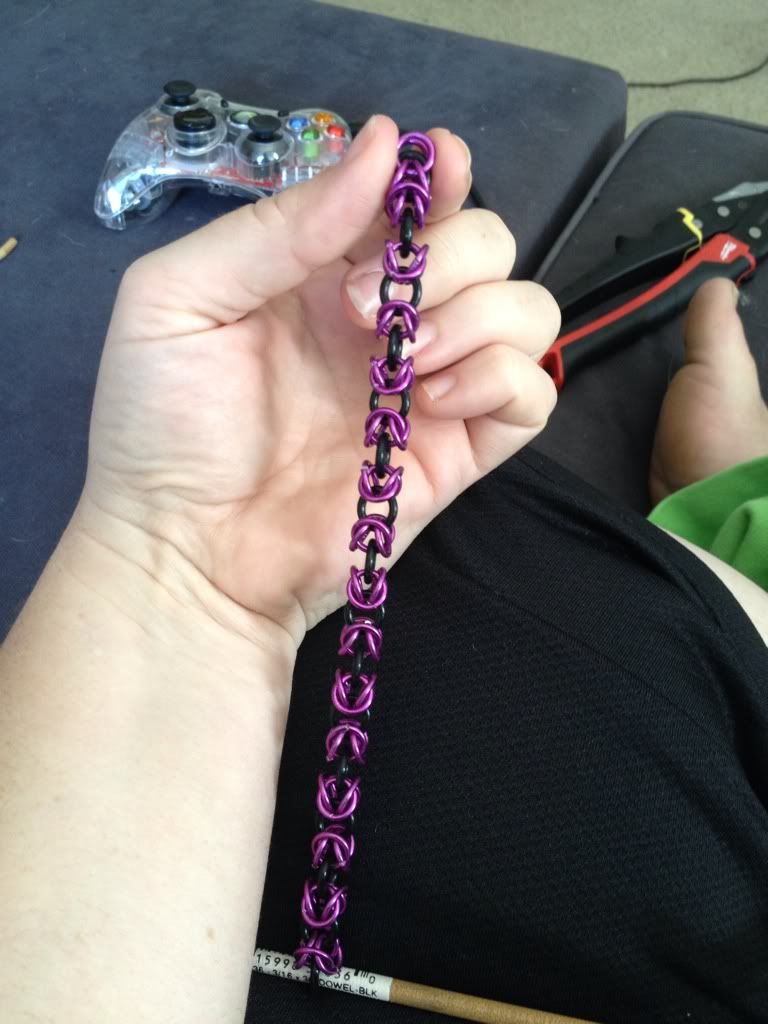
Stretchy rose (byzantine) bracelet


Whoever came up with these stretchy jump rings is a genius. I almost want to say I love them, but they haven't taken me out to dinner yet.
I really don't like clasps, especially since I have fat wrists for a girl. One size fits all means my wrist needs to suck it in to get the clasp to work. And heaven forbid it's one of those lobster clasps and you're trying to do it one handed. I have a few spinny clasps on some bracelets but lets face it, one handed you're hopeless. So our husbands and our friends are forever loved as our "Hey, can you put this on for me" go to person.

Moving on. Here is how you join byzantine with stretchy to make purple "roses" on a black "vine". How is this different than a regular byzantine bracelet? Because the stretchy rings don't open.

Coil and cut your jump rings. I did mine on the blue dowel rod so they should be about 10mm.

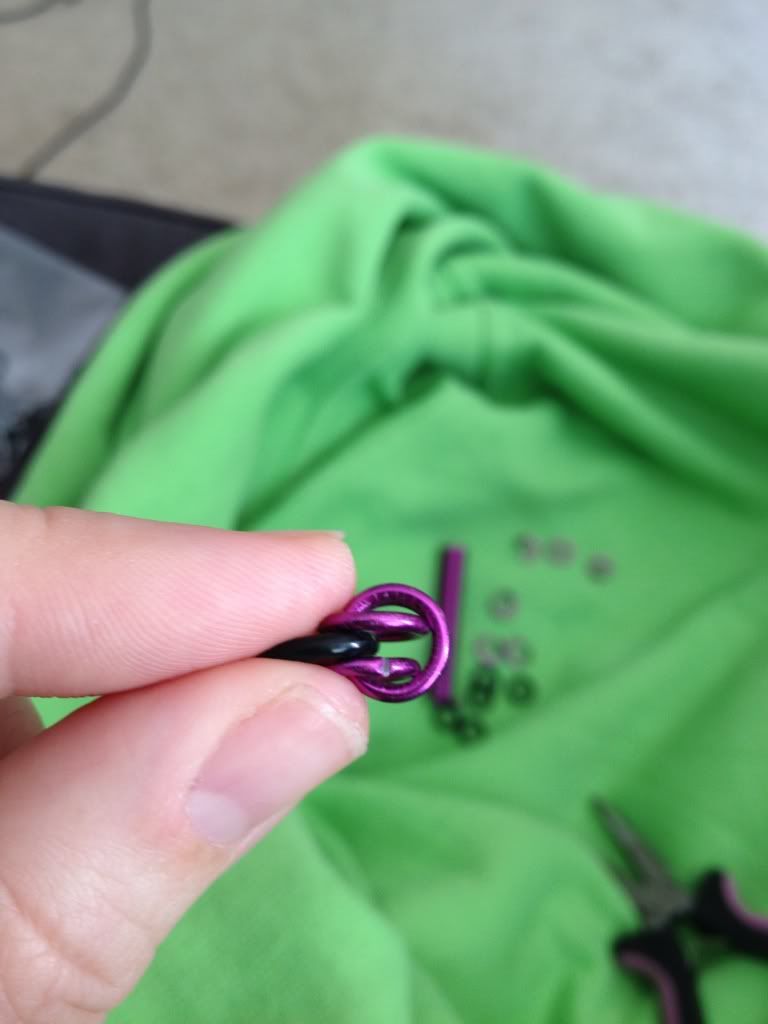
Take one of the stretchy jump rings. I have the Darice 10mm ones in black. (Step 1)

Put two purple (exchange purple for whatever choice color you choose) jumprings through the black ring. (Step 2)

http://i1158.photobucket.com/albums/p609/mamakweh/ADD3966A-E897-47A1-B044-81B5649959FD-1646-0000016B78E0B866_zpsa0bd63bb.jpg?t=1348625712
Put two purple jumprings through the other two jump rings, but not through the black. (Step 3)


http://i1158.photobucket.com/albums/p609/mamakweh/B943955B-33EB-4079-BA36-843E92FD94FB-1646-0000016B7B7820AC_zpsd40abcec.jpg?t=1348625714
Separate the top two jump rings and lay them on opposite sides of the black ring. (Step 4)
http://i1158.photobucket.com/albums/p609/mamakweh/DCC59917-B078-4E91-BB3D-1C9252225887-1646-0000016B7F192B6B_zpscda86a16.jpg?t=1348625716 http://i1158.photobucket.com/albums/p609/mamakweh/E49FA296-FC3C-4E0C-9BB3-A4DF9D6A898F-1646-0000016B81B6F81B_zps54b2e1a3.jpg?t=1348625718

http://i1158.photobucket.com/albums/p609/mamakweh/EFE3BB30-A0A4-48A1-9C94-E8B87181055F-1646-0000016B844D9B77_zps66bfe1b8.jpgNow separate the other two purple jump rings so that the first two that are side by side with the black ring are now top again. (Step 5)

Open those two jump rings and insert a new black ring in them so that they are looped through it, then reclose the jump rings.  (Step 6)
http://i1158.photobucket.com/albums/p609/mamakweh/7F0A2A35-399C-420D-9AD7-3D7BE032475C-1646-0000016B86F99EB0_zps7568a45a.jpg http://i1158.photobucket.com/albums/p609/mamakweh/8B3B9805-2F1C-4539-BEC1-F453D7C8EA85-1646-0000016B89A9863F_zps445571ea.jpghttp://i1158.photobucket.com/albums/p609/mamakweh/4DDFA64E-39BB-4824-B4CE-8298E7AB8A3C-1646-0000016B8C4B7A48_zpsd7d2e9c3.jpg

Now you're back at step one with a new black stretch ring.

http://i1158.photobucket.com/albums/p609/mamakweh/257368CA-BE75-44DE-836A-15213BF8D1F6-1646-0000016B8EDFFD2B_zps16231a64.jpg
Repeat steps 1-6 until you have the chain at the length you want.
http://i1158.photobucket.com/albums/p609/mamakweh/0B954E8B-D114-4DDB-AE33-A600C38736BF-1646-0000016B918D0E9C_zps7ac29c25.jpghttp://i1158.photobucket.com/albums/p609/mamakweh/B37943CD-AC2E-424E-A68E-836358DB22A3-1646-0000016B9424248C_zps9dc4a5f9.jpghttp://i1158.photobucket.com/albums/p609/mamakweh/CB2C2822-F7B2-48BB-8740-FB3FE93B4B11-1646-0000016B9AFEFDCA_zpsda4903f4.jpghttp://i1158.photobucket.com/albums/p609/mamakweh/99945ACF-5FA5-4BA0-BA9B-50B3806498E0-1646-0000016B9D897861_zpsa7b53dd5.jpghttp://i1158.photobucket.com/albums/p609/mamakweh/3D72C855-1E5B-4EEB-9A94-7BF88F502629-1646-0000016BA1164E64_zps717a865d.jpghttp://i1158.photobucket.com/albums/p609/mamakweh/65AD422E-4E54-4CFF-9E64-7330BED6DADF-1646-0000016BA3B282EC_zps9fd986b8.jpghttp://i1158.photobucket.com/albums/p609/mamakweh/ECE961A6-8709-4D5F-9D82-8342FCB81F79-1646-0000016BA6577B3C_zps248af8cb.jpg
I don't like my bracelets tight so I stop when the bracelet is actually at the length it takes to go around my wrist comfortably and not stretched at all. At this time I stop after I finish step 5.

http://i1158.photobucket.com/albums/p609/mamakweh/AEE42ADC-1003-4CA9-9695-C3B507CE2968-1646-0000016BAA2FB16A_zpsd74354c5.jpgInstead of step 6, you will now use the first jump ring that you started the process with instead of a new jump ring.

It's not very important that you have the chain line up exactly because it's going to twist on your arm. But if you're ocd about this stuff like I am, look at the chain and make sure the black rings are in a pattern of open, side, open, side, open, side.

If it starts with open you need to end it with a closed or vice versa if you're going to be all anal retentive about this.

Now that that first black stretch ring and the other end of your bracelet. Open the jump rings like you would have on steops 4 and 5 and insert the first black ring in them. On this last one, I find it easier to open both purple jump rings to insert the black on in so that don't drop the black side and mess up my straight line. http://i1158.photobucket.com/albums/p609/mamakweh/EF603FCF-3EEE-4BCC-B2DB-274A0E0B1588-1646-0000016BAE32D167_zpsda243d28.jpg

Now your bracelet should be done. http://i1158.photobucket.com/albums/p609/mamakweh/6A12A95C-635B-43A0-85A5-B703A13EA6E7-1646-0000016BB1C9BC93_zps6ae7725d.jpg

YAY!!!!!!!!!!!!!!

http://i1158.photobucket.com/albums/p609/mamakweh/F4F2E33C-614C-476C-A199-AA72442B02D7-1646-0000016BBBFF15B2_zpsd5bf1423.jpghttp://i1158.photobucket.com/albums/p609/mamakweh/FA05CBD5-57A5-4C75-AC7D-8C09914390E6-1646-0000016BC0308D2C_zps3e98f37b.jpg

Tuesday, September 25, 2012

How to make jumprings- cheap

When I go to try out a new craft I have two things in mind
  1. How can I try this without spending a ton of cash?
  2. What are my options if I want to keep doing this?
When it came to chainmail I did a little research.

As usual, it's much cheaper to buy the wire and cut it yourself than it is to buy the jump rings pre-made. Duh.

So I googled how to coil the jumprings myself and found a ton of ways to do it. But there's also tools involved. Making them myself wasn't going to be as cheap as just buying my first pack of jumprings. But if I continued with it, they would be worth the investment.

At Hobby Lobby (I was in Texas at the time and they're everywhere) I tried to stick to rule #1, "make it as cheap as you can." Since I didn't know if I enjoyed the project yet, just get the basics... jumprings. I grabbed a bag of silver jumprings and headed towards the cash register.

But inside was only 120 jump rings. That's not a lot for 4$. What if I needed more? And what if I liked it? (This is the "not so bright" side of me that ends up getting herself into trouble.)

I ended up going back to the wire section and getting what I needed to make the rings.
So here's my notes from my first wire coiling experience and I'll show you how I've evolved from there. 

Wire
    https://sphotos-a.xx.fbcdn.net/hphotos-ash3/68717_141799675965954_1484251978_n.jpg
  •  The sites said to start out with aluminum wire. It's easier to bend than copper.
  • Hobby Lobby only had powder colored aluminum. (I'll get to why that's important to know about later.)
  • Most sites said to start with 18g. Hobby Lobby only had 16, 20, or 22. 20 and 22 are uber small so I had to go with 16. This worked out for me. 
  • Most wires come in 3 yard packs. Spools can go up to 10ft but they're copper.
Item to coil on
    https://sphotos-b.xx.fbcdn.net/hphotos-snc6/228951_141799839299271_226659956_n.jpg
  • The how-to sites all used a metal rod to roll their coil with. Hobby lobby didn't carry that. So I figured since I'm doing this cheap, lets go with dowel rods. They're literally like 40 cents. This is where I first learned that cheap isn't always easy at first, but I've actually stuck with these and I'm going to show you how to make this really easy.
  • Each rod has a color at the end of it to mark the size. My regular rod is a blue tipped and I grabbed a black rod for smaller rings. 
  • You can use a pen or something else that's hard and a tube if you're not worried about size but I didn't think of this until AFTER I bought supplies. 
Wire cutting tool
  • Hobby lobby only had wire snips... for flowers... Suckiest part of my first experiment with chainmail. But I bought them.
Shaping tool
https://sphotos-a.xx.fbcdn.net/hphotos-prn1/548836_141804119298843_431221812_n.jpg
  • We had pliers at home :) So I didn't have to buy them. But they would have been 2$ there.
So cost of bag of 120 silver jump rings- 4$= 3 cents per jump ring.

Cost of making it myself- 3yrds of pink wire (2$), cutters (5$), 2 dowel rods (1$), and pliers (2$)=10$ 
That made 250 jump rings on the blue dowel rod = 4 cents each

BUT... that also gave me the supplies I needed to make more. So all I would need for the second batch of 250 jump rings was 2$ and less than 10 minutes worth of work.
2$ divided by 250= .08  That's less than a penny per jump ring. When you're dealing with over 100 jump rings, pennies add up. 
https://sphotos-b.xx.fbcdn.net/hphotos-prn1/457541_10150918962272856_178859382_o.jpg
What I made with jumprings I made myself
So if you're probably going to continue with this, invest in the tools.
https://sphotos-a.xx.fbcdn.net/hphotos-prn1/s720x720/11768_10150905597932856_1841510780_n.jpg
Bracelet I made with store bought jump rings.

Have I bought more tools since then? Yes. Were they a little more expensive? Yes. But were they worth the investment? Yes. 

NOW WE GET TO WHAT YOU CAME HERE FOR.
I talk a lot. I know. 

So first you start with your wire. For your first project, start with aluminum, not copper. Aluminum is softer, easier to bend and work with. It doesn't hold up to a beating while worn like copper does, but it's easier to cut (especially with pinch cutters like flower cutters.)

But there are two different coloring techniques for wire that you need to take note of.

The first is powder coated wire. I hate it. I really do.  It's extremely soft and makes thicker jump rings. How? I don't know. But I find it harder to work with on a tight pattern. The color also cracks in the middle of the ring where it bends the most. And that color that cracked is now all over your hands when you coil it. The colors are much softer. I only use these when I working with something I want to look aged. 
The other wire "permanently colored". Remember making Easter eggs where you had to boil the water and shrink the plastic to fit the egg? That's what this kind reminds me of. The color almost stretches as you bend the wire. But if you do get a snag in it, it can peel off. But I wear my bracelets made of this daily and they don't look horrible like the powdered does. Darice is my favorite of the permanent colored brands. And it's always on sale at Joanne's for $1.25 for 3 yards. It's rare that it's not on sale there.
How do you know which is which? One has sharp bright colors (the good wire) and one has dull colors (the blah wire.) 
https://sphotos-a.xx.fbcdn.net/hphotos-ash4/390506_141800059299249_22470437_n.jpg I use 16 gauge to make jump rings unless it's a connecting ring. The smaller the ring, the smaller gauge I use. 

Now you grab your dowel rod. I use the blue dot dowel rod. I don't have the measurements for it (because I pulled the info sticker off of it :( sorry) so I'm going to have to find that out and fix this later. JUST LOOK FOR THE BLUE DOT ON THE END. But for now, here is a picture of the sizes on a black dowel rod.

Loop the wire in the direction you tend to keep spinning it. As you spin it, you wan to have the sides of the wire touching. Make it just like the coil on one of those old door stoppers that makes the funny noise when you hit it. Tight coils. I find it's easier to guide with my thumb on my right hand so I usually loop from the back up and over to the front then under to the back. Pictures speak better than my words, sorry.  
https://sphotos-a.xx.fbcdn.net/hphotos-ash3/548563_141802435965678_2121629287_n.jpghttps://sphotos-b.xx.fbcdn.net/hphotos-snc6/224437_141802272632361_1929271332_n.jpghttps://sphotos-a.xx.fbcdn.net/hphotos-snc7/395233_141802689298986_961037048_n.jpg

Because the dowel wood is soft, the wire will eventually hug it enough that you don't have to hold the end. But until it catches like that, you pretty much just have to hold the end with your left thumb and turn the rod and guide the wire with your right hand and thumb. Sounds hard, but it's really not. 

https://sphotos-a.xx.fbcdn.net/hphotos-snc6/252560_141803039298951_1769199865_n.jpg
It's still on the rod, but you can see I've already twisted some off
Continue to wind the wire around until you have about a half to full fists  length of coil. This part I've learned over time. The wood is soft and you have to twist this wire off eventually. While winding on wood makes it easier to wind, getting it off can be tricky. So at this point in the coil, I start to twist it off. I grip it with my left hand and twist the rod with my right. So the coil does not expand on me, I alternate the direction I'm twisting every time the wire starts to budge. If you're done at that length, be done. I usually only wind that much at a time so I don't have tons of unused jump rings and wire that I needed a different size. But if you want to keep going, put the last inch of that coil back on the dowel rod and continue winding, sliding it off every time you have a half fist length on the rod. Do you have to slide it off periodically? No. Is it a pain in the butt to try and get off if you don't? YES!

Now we cut the wire. I cut 3-4 rings off at a time depending on which cutters I use. There are three ways to cut. 
https://sphotos-b.xx.fbcdn.net/hphotos-ash4/417200_141804682632120_91436645_n.jpg
  1. Pinch cutters (top ring)
  2. Aviation snips (middle ring)
  3. Saw cut (bottom ring)
These provide different cuts in the link of the jump ring. 
Pinch cutters are exactly what they're named for: they pinch the wire till it breaks. This leaves you with a very gapped edge and makes it very easy for your jumprings to come apart from each other. You can also only cut about 1-2 rings at a time and still have to work at it to get them to cut through. This hurts my wrists a ton. But they're cheap (about 5$)and they work so if this is a project for you, give them a try. I know Joanne's will take them back if they don't work for you.  
https://sphotos-a.xx.fbcdn.net/hphotos-ash4/399718_141803452632243_1477841058_n.jpg
What the tip of the aviation cutters look like (a bird beak)
https://sphotos-b.xx.fbcdn.net/hphotos-prn1/541298_141803299298925_901729781_n.jpg
My aviation cutters, easiest cut in the world
 Aviation snips are my favorite. They're what I use daily. They cut the ring in a way that you have to reshape it a little, but they provide the best cut without having to buy into the jump ring saws. Their cut is more of a slanted cut and the edges slide together pretty much perfectly. Every now and then you get a bent edge, but that's usually because you cut up too far in the coil and bent the next ring with the tip of your cutters. Aviation snips tend to run about 14$-24$ and you get them at a hardware store.

Saw cutters- never used, never will use. They're super expensive (anything over 100$ is super expensive for me) and tend to bur a lot.  Every saw cut package that I've bough has about 1/4 of the rings with horrible edges, and these are the ones I actually get from Joanne's (when they're on sale for 50 cents a pack because no one wants to buy crappy made items.)

Close the jumpring with your pliers and you're done. BUT if you've used aviation snips, you have a little extra work to do but it really doesn't take long at all after you get the hang of it. 
 Here's how I do it. 
I hold the jump ring with my left hand and use my pliers to make the two edges in line so the loop is flat but still has a gap. This will leave you with an egg shaped capital C. Now take the pliers and gently pinch the top down to the bottom edge, putting the pressure literally on the top corner you want to move into place. Walla, you're done. 
https://sphotos-a.xx.fbcdn.net/hphotos-snc7/292875_141804465965475_525239323_n.jpghttps://sphotos-a.xx.fbcdn.net/hphotos-snc6/284234_141804542632134_1621708643_n.jpg

I understand this is a really long blog, but I want you guys to notice the thought process that goes into it. The only things I've really changed are the types of cutters I use and my process to get the coil off the dowel rod, and sometimes I use a pen or hard straw to coil wire around.

While I have other items that I use to make the jewelry (round nose pliers, stuff for making paper beads or accessories to put on the wire) my investment into this wasn't much and I still made some pretty awesome stuff with my cheap pinch cutters and the wire I hate to use. 
https://sphotos-b.xx.fbcdn.net/hphotos-ash4/464957_10150918964912856_639715090_o.jpghttps://sphotos-b.xx.fbcdn.net/hphotos-ash3/532823_10150922879402856_1593078281_n.jpghttps://sphotos-a.xx.fbcdn.net/hphotos-ash3/s720x720/538851_10150908462792856_1881340190_n.jpghttps://sphotos-b.xx.fbcdn.net/hphotos-snc7/412099_10150918717602856_201674176_o.jpg


   So go out and have fun with this. Don't break the bank trying to make something pretty. Do a few, learn, get better, learn more, google, come back here and find a few patterns, and be crafty. But never feel you have to buy the super duper blahblah4000 to be good at a craft. Someone had to make that craft before someone had to think to make the blahblah4000. Am I right? Of course I am!